sábado, 29 de octubre de 2011

On Closet Cosplay and Hetalia

While I´m not a fan of "closet cosplay", I must admit that sometimes this sort of costume comes in handy.

For those of you unfamiliar with the term, a "closet cosplay" is any cosplay that can (and is) made out of items that you can pull out of your closet or wardrobe and put on. No modification or sewing is needed, just an eye for coordination and a brain capable of computing and generalizing.

This kind of cosplay can lead to attempts such as this one:

 Sorry, you´re cute, but......two pigtails and a Death Note do not make a Misa-Misa cosplay....you need something more in-character and similar to what she´d wear, at least...


On the other hand, it can also lead to attempts like this one:

In which the color of the vest might be off, and his formal outfit not worn, but the general look of the character and what he´d wear is pretty much spot-on.

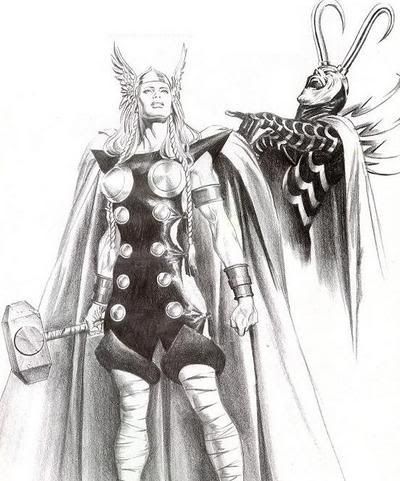
Why mention this kind of cosplay? Well, I´ll probably embark on my own casual closet cosplay soon. With exams coming up, and having had to cancel (probably) one of my December cosplays.....I want to dedicate what little time I have to Thor.

Yet, I have been invited to a casual Hetalia Invasion of IKEA in two weeks...I have no time to make anything decent, and no wish to spend time doing so. I still want to meet people (new people!!), and I still want to wear something nice if I can, so I´ve submitted (pending approval by the Hetalia group coordinator) my idea:


The idea is cosplaying Female England, Gakuen version (the blondie to the right). This is apparently from "Nyotalia".......a genderbending of the Hetalia characters.....go figure.....I´ve only watched the first season of Hetalia, frankly.....I might pick up where I left off, though. I´m fascinated by genderbending.

So, I have the tartan short skirt; I have a white shirt, I have the wig, I have the hair clips, I have the beige-ish v-neck sweater.....I even have school-issue shoes and a red neckbow (which I might substitute for a red or black tie.....as I´ve seen in other images of her). If needed, I even have a black blazer (it´s apparently a part of the uniform, though it doesn´t appear here). I´m only missing the black socks (I only have a pair of  navy blue and a pair of white  kneesocks), which is easily remedied going to the cornerstore.


I could technically go with either a tie or a bow, or a black v-neck (which I also have) instead of a beige one....As well as a solid red skirt (which I don´t have--lucky there´s a tartan uniform version!).


So, that is a closet cosplay. I literally have everything I need for this character, without having to buy anything--after all, I could probably use the navy blue socks if I wanted to. The tartan might be slightly different, or the beige lighter than in the pictures.....but it´ll still be recognizable as the character.

I think that that´s what´s especially important with closet cosplays. Since it´s something you get out of your wardrobe and supposedly don´t modify, it´s natural that it´s not exactly the same as what the character is wearing in its series. What´s important, really, is that it´s similar or it´s something within the style of what that character would actually wear. Insomuch as an animated character can pick what to wear, of course.

What do you think? Do you like or dislike this kind of cosplay?

viernes, 14 de octubre de 2011

Next cosplay projects: December 2011

So, I won´t be cosplaying that pumpkin girl this Halloween.......in the end I can´t go to the Con in Barcelona.....what a shame.... *sigh* darned economy.

But instead, I´ve set up not one, but two cosplays in the "to-do" list for December. Sun Xiang has been relegated to next February. Sorry, Lady Sun!!

The two that I´m going to sew and make are:


Aramis, from The Three Musketeers (because I have been fangirling him ever since I read the book in 5th or 6th grade). So.....a crossplay. A complicated one, at that (so many layers! so many textures!). I will have to wear a moustache and goatee, hahaha. S will be my Athos, so we´ll actually be missing one musketeer...the aparently least-loved one, Porthos.....

December cosplay number two will be (*dramatic drumroll*):

Thor, the goddess of Thunder. Yep, the goddess of Thunder. Thor actually gets turned into a woman in the Earth X comics universe. It´s situation that I love, since I adore genderbending, gender awkwardness and wierd situations. I´ll be accompanied by S as Female Loki. We will probably participate in our first cosplay contest with this pair.

Needless to say, I might modify the costume a teensy bit.....if I lower the boot length, I might not look like I have....erm...."thunder thighs"? Never said better. I think that OTK boots would make any woman look like she has huge thighs, personally. So I might end up doing another of "Lady Thor´s" versions instead of this one. One thing is for sure though: I AM making a Mjölnir: no ifs, ands or buts. I want a Hammer of Doom.  I´m getting Madonna flashbacks every time I look at her chest, though. *facepalm*


lunes, 10 de octubre de 2011

Princess Zelda: full outfit shots

Well, I hope to be able to take nicer pictures within a few weekends, in my garden. I have to re-do my wig, though, because I unbraided all its sections on Saturday. I was afraid of the wig hair deforming. I´ll make a Zelda Hair tutorial while I´m at it, I think.


Birdie wanted me to poke him. No, really. 


I like how nicely you can see the side-skirt design in this picture.


My elf ears were my favorite part of the whole "makeup" for Zelda. They are so darned fun to wear. Not many people think about it, but her ears are an essential part of her character!!


When Birdies attack. Boy, was it hot in the con. It was even worse when you had to hold a very fuzzy plushie that naturally warms as the day goes on. I literally found the solution ot the problem by using my head.


All three photos were taken by my friend S. yay for the photographer! Though getting a professional photographer sometime would be really really cool, for once....

domingo, 9 de octubre de 2011

Zelda Progress: Dress & Painting

I didn´t take any pictures of the making of the dress because it was such a huried process, and had a lot of trial-and error in it. I am never again using a sleeveless dress as a base pattern for a dress with sleeves--it´s too complicated to fit the sleeves in the end, especitty when like me you´re not used to attaching sleeves. *sigh*. Also, I somehow made the dress too big for me, so despite my wish to make it a one-pice, seamless dresss (well, minus the side seams), I had to add darts at the front and back. I also cut the top too muchh: the boat neck ended up being too wide to be held up by my shoulders alone, and showed off my bra straps...luckily, Zelda ties her capelet under her armpits and around her back, so the bra straps and neck weren´t a problem at all. It still bothers me a bit though, so  maybe I´ll remake it sometime.


The finished (sewing-wise) dress, ready for me to paint the patterns on. I drew the designs on first in my trusty silver chalk pencil (which is conveniently erasable with a regular eraser).


Closeup of the rectangular design in silver.


After that, I traced over the outline in  gold fabric paint.


I started filling it in to make the solid design I needed.... And this was the end result:


Closeup of the neck area with the embedded jewel section..... I really like that wierd sort of squarish curl at the top. It was fun to paint.


The sleeves also had a square "U" design on them.  It was hard to make a pattern for it; I ended up grabbing a measuring tape and just going with that.


There we go. both sides painted, all designs complete. I averaged around two hours for each side (painting the rectangle design) and about forty minutes per side for the other designs (boat neck, sleeves and front pendant section). Took longer than I thought it would. I had to paint it twice, so that the gold color was "solid" enough, and there was no magenta from the dress bleeding through. All in all, I used about a whole small bottle of paint for this whole project. Whew. 

I haven´t taken any pictures of the capelet...it´s a semicircle, roughtly 70cm in diameter, with two ribbons sewn to the ends. It perfectly reaches my elbows, like it should. I made it using some leftover raw silk from my Mulan outfit and another leftover piece of white cloth that I had lying around. I needed to use two because both of them were too thin to use by themselves.


sábado, 1 de octubre de 2011

Zelda Progress: Birdie

Yesterday I went to Madrid to buy stuff. What stuff, you say? I decided just a few days ago that I needed something to give my Princess Zelda cosplay a bit of..."zing". She wears such a simple outfit, poses are limited and it just doesn´t look as "worked at" (although it is) as other more detailed cosplays.

So in order to capture that "woah, cute" feeling, I decided to make her bird/giant chicken. Who, having no appropriate name, has been baptized as "Birdie" by myself (yes, I am so incredibly original).

For those of you who still don´t know what Birdie looks like,  here he is (psst, he´s the one with wings):
The thing is, I´ve never ever made any type of plushie. So this was an adventure.....an epic adventure full of a LOT of trial and error. Yes, tons of it. *sigh* I´ll probably be able to make a bird plushie next time within a few hours, maybe half a day. This time, It´s taken me a day (today) and around 4 hours last night. I lost a lot of time giving Birdie a liposuction this morning (he wa too darned fat. and his head kept going down, instead of his tail. Grah). So, let´s see a few steps in the making-of, shall we?


First of all, you have to cut out the shapes you catually want the bird to have...In my case, I wanted him to have a white belly, so I cut out the "sides" in blue and the belly in white.


Then you sew the belly and the blue sections together...remembering to zigzag stitch after the regular stich because fur has an annpying tendency to lose its hair unless you secure it carefully....


Funny step: turn it inside out. You´re supposed to leave a hole so that you can do this on one end....I chose the tail.


Stuff it. No, really. You´re suppsoed to use real stuffing for this kind of thing, I guess, but since I don´t particularly want to pay extra for that.....I just used regular cotton, the one that you sometimes use in cotton balls and stuff? Only it comes in huge packs that  are in a "roll" and you can easily pull it apart.

This is birdie after getting stuffed at approximately 2:30am in the morning. ---->


He was too fat, though, so in the morning I gave him a liposuction and cut some off his belly--which sadly  involved undoing all of the work I did in the wee hours of the night (minus the beak). Also, in an rather stupid move, I mistakenly sewed the belly fur wrong-side-up......but it looks intentional. Yeah, intentional.

After that, I started on the wings. Yes, wings!! Notice that he has two rather nice ones in the picture--ones that mix blue, white and turquoise feathers. Since I couldn´t get my hands on any fur in that particular shade of turquoise (more like in any shade of turquoise....and I had to settle for pink isntead of magenta fur.....but oh well)....I ignored it.


Here are the cut parts.......some of which I had to re-cut because I forgot to flip over the "wing pattern" I had made .....


Wing number one, sewn and pinned (what an annoying bit of work......)


Wing one, finished! i had to wrestle with the sewing machine, but we made it!!


Wing two, finished!! Shhhh, don´t tell anyone that they´re not exactly alike......spot the differences? Definitely don´t want to make more striped wings anytime soon. Oh, and the underside I made solid white, like Birdie´s belly. It felt more natural that way.


This is birdie after sewing his eyes (an amber gem with a circle in black marker) on, as well as his wings. So pretty!!

Initially, I hadn´t planned to give him feet. However, despite sewing weights into his...erm...posterior (XD) he kept on insisting on not standing up. Hence the feet. Yellow cloth, folded into a trapezoid, sewn by hand and filled with rice to dead-weigh. 


This is birdie after I finished making his collar accesory. Golden chain (metal) and foamy circles, spray-painted with leftover gold paint. He has twelve, the same amount as I have on my belt. <3 The circles are superglued onto the chain. I might get them secured more with some extra tape or something just in case.


So, what do you think? Isn´t birdie totally rocking the cuteness factor? I think that my first plushie attempt can definitely be counted as a sucess!! My parents were pretty surprised when they saw it; my Dad actually loved it (I know, I was surprised too). Do you agree? The only thing I really hated was the amount of hand sewing I had to do to get this done: eyes, attaching the wings, beak and feet......definite bleh.


Say bye-bye to everyone, Birdie!!